IoT Arduino Vending Machine
In this blog post I will describe a IoT (Internet of Things) Vending Machine that I built quite some time ago with a friend of mine Sigurd Jervelund Hansen.
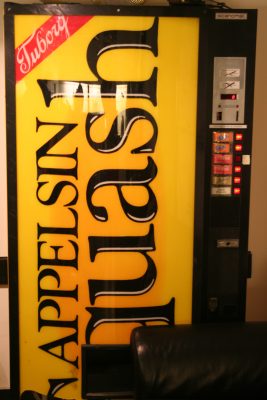
At Sigurd’s dorm room they got hold of an old vending machine free of charge, as it did not work. We quickly decided that we wanted to get it working and give it a overhaul as well. In the end we enabled it to take both RFID/NFC cards and coins and make funny twitter updates about it.
The video below gives a short overview on how it works.
As mentioned we reused some shift registers, relays and voltage regulators on the original mainboard. One Arduino Pro Mini is connected to the mainboard and takes care of reading and lighting up the buttons (lights up if the relevant slot is not empty), controls the 7-segment LED display, reading the output from the coin validator and returning money if the user requests it by pressing a dedicated button.
A second Arduino Pro Mini is used to read NFC/RFID cards using a Mifare RC522 reader. It will store the ID of the tag in its EEPROM and then check there is any credit on the card. Thus it will actually not write any data to the card. The two microcontrollers are simply connected via UART.
If I would have to do it again I would properly use a larger microcontroller like the ATmega1284P which is also used on the Balanduino. The reason why we did not use this chip to begin with, was because the RFID/NFC capability was added later on and we ran out of I/O pins on the first Arduino Pro Mini.
On top of that we also made it able to tweet. First we used a Raspberry Pi connected to the Arduino via Bluetooth, but as the SD card on the Raspberry Pi kept getting corrupt, we ended up using an Electric Imp instead. It is a 32-bit ARM Cortex M3 microcontroller with a WiFi module built into a SD card form-factor.
The Arduino will send out a status update every minute, the Electric Imp will then send out a tweet if there is any updates.
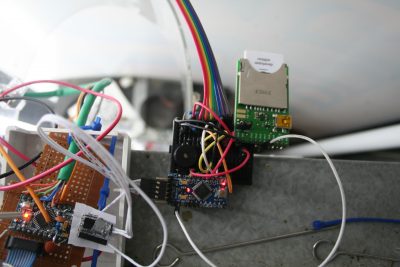
The picture below shows the two Arduinos and Electric Imp, as it can be seen they are simply mounted on two breadboards.
Below shows two example tweets. It includes a random selected message and then the actual information in parentheses.
The code for the Electric Imp and the Raspberry Pi can be found here respectively: https://github.com/Jervelund/VendingMachineImp and https://github.com/Jervelund/VendingMachinePython. Note that the Raspberry Pi code is currently not used.
Furthermore it also tweets if any of the slots are jammed or empty. It will then tag the guy who is responsible for restocking the machine. This is quite useful, as he does not have to check the machine frequently, but will simply get notified once any of the slots are empty or if the motor is stuck, which can happen if one of the cans gets jammed.
The twitter feed is available here: https://twitter.com/43vending.
As you can properly see from the video, everything is pretty hacked together. For instance the feeder for the coin validators is made out of an old Coca Cola can. It looks horrible, but it has actually worked for more than a year now.
It was quite fun to do this project, as it was a very different way of working, as we had to reverse engineer a lot of the existing hardware. For instance we took out the coin return mechanism from the old one which featured both a coin validator, coin sorter and coin return system in one. It took quite some time to figure out how to read the state of the coins and make a new driver circuit for the solenoids.
Luckily all the components on the mainboard (except the microcontroller) still worked, so we could reuse all that by simply solder wires directly from it to the primary Arduino Pro Mini.
The source code for the primary Arduino Pro Mini is available here: https://github.com/Lauszus/ArduinoVendingMachine.
The code for the other one that is in charge of reading the RFID/NFC tags can be found on Github as well: https://github.com/Jervelund/VendingMachineRFID.
Also if you got some ideas for more funny messages it can tweet, leave it in the comments below or simply send a pull request at: https://github.com/Jervelund/VendingMachineImp.


Pls contact me I am interested in your Vending Solution
@Phil
I have now sent you an email.
Please contact me for an interview! I love your projects and want to blog about them!
@CA
You can contact me via email: lauszus@gmail.com or kristianl@tkjelectronics.dk
Hi, i have some questios for you guys, i’m developing almost the same project as you. I am looking to add an arduino/RB pi to one vending machine. The machines use MDB protocol and all i want to do is to know when i have to refill them. Can you help me with this?
@Enrique
I have never used the MDB protocol. We have replaced the entire system, so the original microcontroller is no longer used.
@Kristian Sloth Lauszus
Can this be modified to use the Nayax payment system instead of nfc?
im final year student i want you to guide me to do one similar to this project please contact me please please